No products in the cart.

Like a Pro: 7 Cool Tricks for Taking Great Photos with Your iPhone
Photography is an art requiring the sole vision of things from different perspectives. Not a single professional camera may create the perfect picture without the photographer’s vision. But, have you ever thought that you can be a photographer with the vision of the perfect picture and without a professional camera? With an iPhone at hand, photography is a true piece of art. The only thing you need to know is how to get there. Keep reading to discover the 7 cool tricks to being that photographer with only an iPhone at hand.
Adjust Focus and Exposure Settings
When you get to photograph with an iPhone and want to have pics equal to photography with a professional camera, you need to know this trick. The built-in iPhone camera works like the pro when you tap the screen, hold the sun icon that appears next to the yellow square, and start adjusting the exposure by moving the icon either up or down. By doing this, you get the perfect exposure to light that makes your picture an outstanding piece. Also, when you have various subjects to shoot, you may tap on either of the subjects and make one focused by the lens while the others blurred in the background. Sounds interesting, right?


Shoot From a Low Angle
Photographing from chest-level height is the most common one. But, we want to be creative like a pro, right? Accordingly, you need to change the narrative. Instead of shooting from the chest-level height, you may shoot from a low angle – to show your vision from an outside-of-the-box perspective. By kneeling or lying on the ground while photographing, you gain the opportunity to show the photography subjects from an unusual perspective, close up details that may not be seen otherwise, and avoid including unwanted scenes in your art.


Create a Sense of Depth
An interesting fact about shooting from a lower angle is that it automatically helps you create a sense of depth – another trick with iPhone photography aiding you to shoot like a pro. A simple way of creating a sense of depth is to find leading lines when looking for the picture shot. Indeed, what we offer is another level of professionalism. You can put the subject you want to shoot close to the camera and make the background out of focus to create a sense of depth for the desired subject. Also, you can go the other way around. When you are engaging in outside or landscape photography, you can put undesired subjects in the foreground and blur them by tapping on the desired one far from the camera lens. Try this and let us know what you think.


Use Live Photo
Here is a trick that not every professional camera is capable of doing – turning your photo into a video. To get the most out of this trick, you only need to turn the live photo option on while photographing. By doing so, you get one pic with a motion effect that creates separate videos from a live photo. As a result, you get interesting and outside-of-the-box content for social media platforms.


Also, you can choose one of the four from the dropdown menu and get cool pics and videos that are trending on social media platforms.
Loop – a never-ending video
Bounce – a back-and-forth video like a boomerang
Long exposure – a photo with the trending blur effect


Rotate the Camera
This one is definitely worth knowing. Have you ever encountered the following situation: looking at a coffee cup and seeing it from a beautiful perspective but not getting it the same way as you see it on the camera? Familiar, right? Then, try rotating your phone upside down, putting the camera lens closer to the subject you want to shoot, and here you go – a beautiful shot of the subject that looks as beautiful on camera as it is from your perspective.
Turn on Grid
With this one, all you need to do is follow the rule of thirds. First of all, go to Settings on your iPhone, go to the Camera section, and turn on the Grid setting. Then, open the built-in camera and see how the view changes with a three-by-three grid appearing on your screen. This helps you place the main subjects of your photo along the grid lines and make your shot visually more compelling.

Use iPhone Photography Accessories
Out of all the tricks mentioned in this article, you should take advantage of this one. To take your photography to the next level, you need the iPhone photography accessories that AllCell offers. Not only you will get better quality pictures, but also will convey the feel of a studio shot to your photos. Which accessories will upgrade your photography game the most?
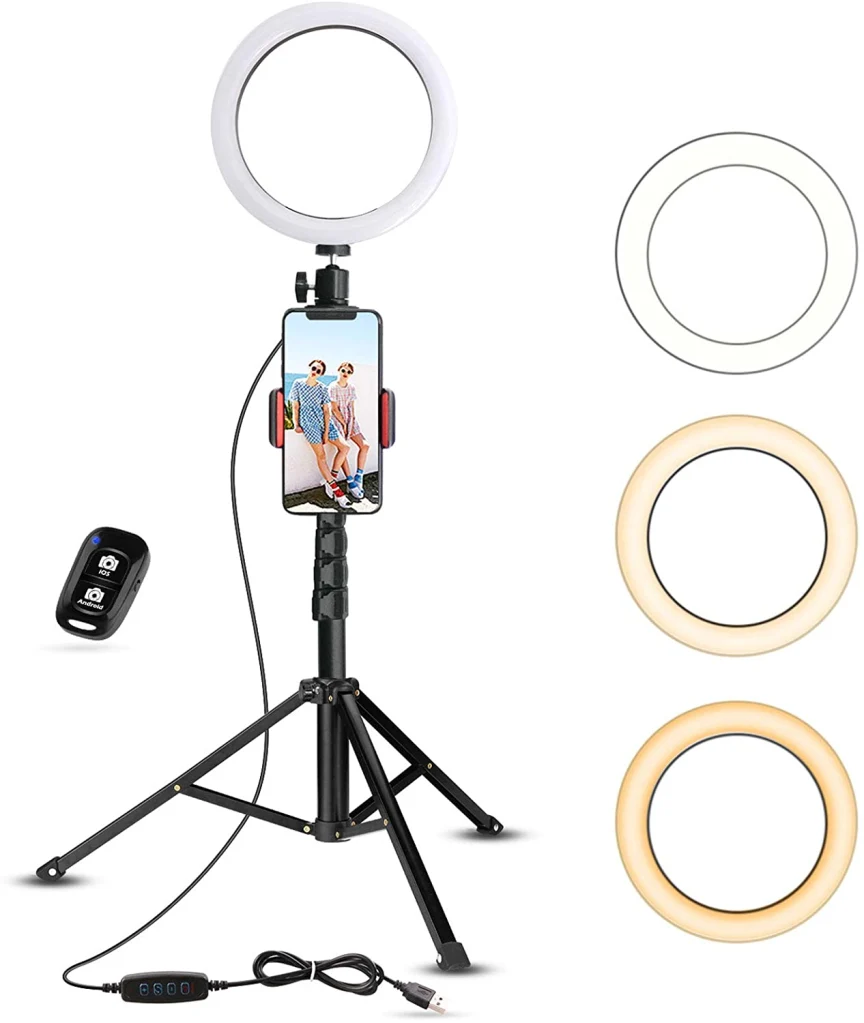
Selfie Ring Light
This will pop up the color scheme of your shot and people will not be capable of telling a difference between your shot and a studio shot. Also, you may change lighting levels and adjust them to the perfect one that you need at that particular moment.
Tripod
Purchase a tripod to stabilize your shots, especially when shooting outside. It will upgrade your picture quality as even a small maneuver may spoil it.

Gimbal
Remember the trick about the live photo? This will get way better if you own a gimbal. It is almost the same as a tripod but gives you the opportunity to shoot in motion and change locations while photographing.

Final Note
Photography is an art and we already know that art can be created with just an iPhone. Just use the tricks the professionals of AllCell offer and shoot like a pro. Visit AllCell stores to purchase photography accessories and more. Everything is available now at our four branches:
- Teryan 52, Yerevan
- Abovyan 35, Yerevan
- Komitas 23, Yerevan
- Proshyan 77/7, Shirak Mall, Gyumri
